How To Use Motion Tracking In CapCut
Estimated reading time: 2 minutes, 11 seconds
Motion tracking allows you to attach elements in your video to a moving object, maintaining their relative position as the object moves. It is a powerful tool to enhance visual effects and make your videos more attractive. Let’s go through the step-by-step process of using motion tracking in CapCut.
Step 1: Install and open CapCut
Start by downloading and installing CapCut from your app store. Open the program after installation to start a new project or to edit an existing one.
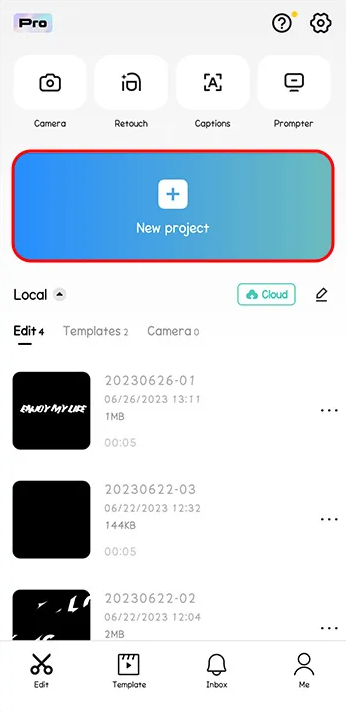
Step 2: Import your video
Select the project you are working on and import the video clip where you want to apply motion tracking. Tap the “+” icon and select your video file.
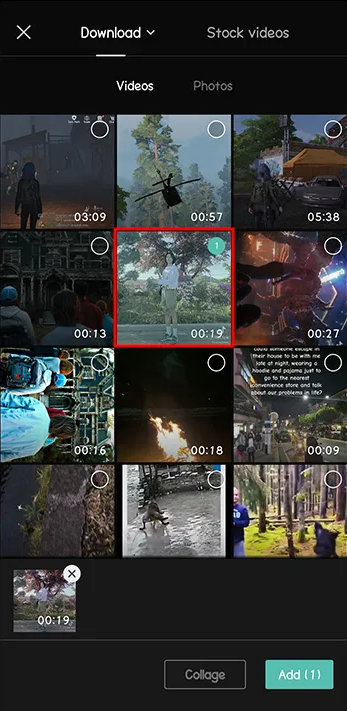
Step 3: Add Elements
If you want to track an element in your video, like text or a sticker, add it to the Timeline. Tap the “+” icon again, but this time, choose the “Text” or “Sticker” option.
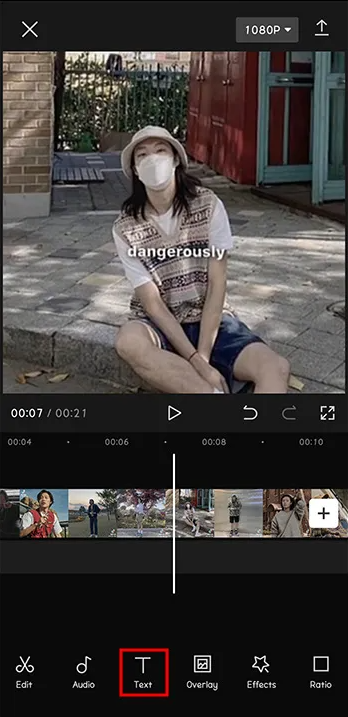
Step 4: Enable Motion Tracking
With your element added, tap the element in the timeline to select it. Look for the motion tracking icon, usually represented by crosshairs or a target. Tap on it to enable motion tracking for that element.
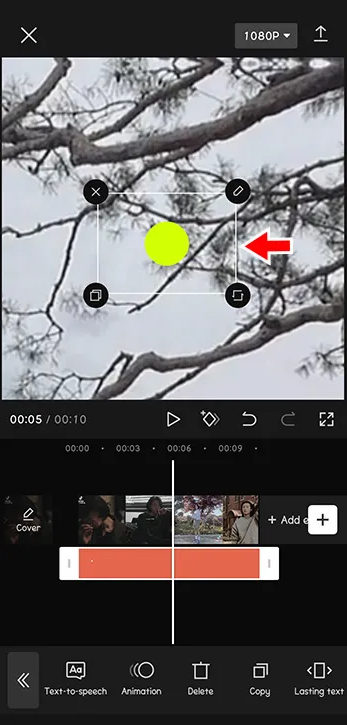
Step 5: Place Tracking Point
Place the tracking point on the object you want to track. CapCut will then follow this point throughout the video. Adjust the size and position of the tracking point for accuracy.
Step 6: Start Tracking
Once your tracking point is set, play the video and let CapCut track the movement. The element will automatically adjust its position to stay connected to the tracking point.
Step 7: Refine Tracking
Review tracking to ensure accuracy. If the tracking deviates at any point, you can manually adjust the position by dragging the element to the correct location.
Step 8: Add Keyframes (Optional)
For more advanced control, you can add keyframes. This allows you to customize the speed of your element at specific points in the video. Tap the “Keyframe” icon and adjust the position and properties of the element.
Step 9: Preview and Adjust
Play the entire video to preview motion tracking. Make any necessary adjustments to ensure a seamless and professional looking result.
Step 10: Save and Export
When you’re satisfied with the motion tracking, save your project and export the video. Share your masterpiece with the world and be amazed at the enhanced visual appeal brought by motion tracking to your content.
Conclusion
Congratulations! You have successfully learned how to use motion tracking in CapCut. This dynamic feature opens up a world of creative possibilities for your videos. Experiment with different elements, hone your tracking skills and take your content to new heights with the captivating power of motion tracking. Happy editing!
